 Pin It
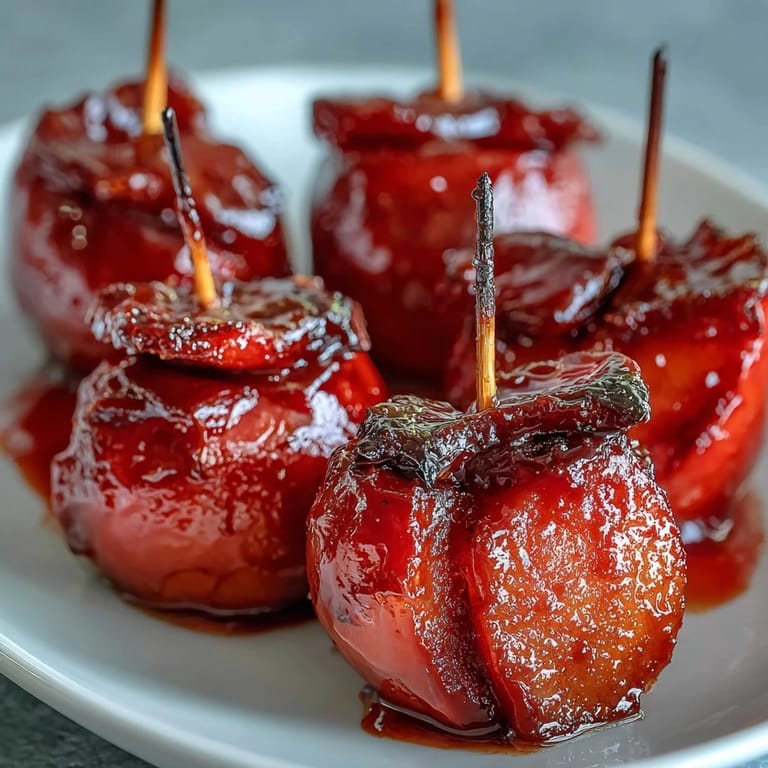
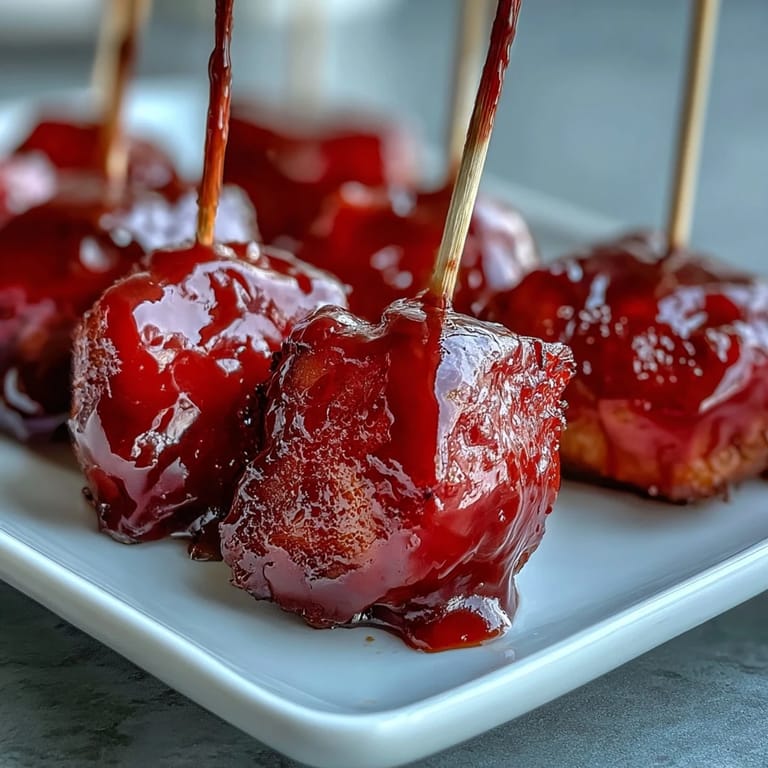
 Transform the classic carnival favorite into perfectly portioned mini candy apple bites that capture all the nostalgic sweetness in one delightful pop. These bite-sized treats feature crisp apple chunks enrobed in a stunning ruby-red candy shell, creating the perfect balance of tart fruit and sweet, glossy coating. Whether you're hosting a festive gathering, planning a party, or simply craving a fun snack, these toothpick-skewered delights deliver big flavor in a petite package. The hard crack candy coating provides that signature satisfying crunch, while the juicy apple underneath offers a refreshing contrast. Best of all, they're surprisingly simple to make at home with just a handful of ingredients and about 30 minutes of your time.
Pin It The secret to these irresistible bites lies in selecting the right apples and mastering the candy coating technique. Crisp varieties like Granny Smith provide a tart counterpoint to the sweet candy shell, while Fuji apples offer a milder, naturally sweeter flavor. The key is ensuring your apple chunks are completely dry before dipping—any moisture will prevent the candy from adhering properly. The hard crack stage at 300°F creates that iconic glossy, glass-like finish that shatters beautifully with each bite. Working quickly is essential once the candy reaches temperature, as it begins to set rapidly. This recipe yields 24 mini bites, making it perfect for sharing at gatherings, holiday parties, or as a special after-school treat.
Ingredients
Tired of Takeout? 🥡
Get 10 meals you can make faster than delivery arrives. Seriously.
One email. No spam. Unsubscribe anytime.
- 2 large crisp apples (e.g., Granny Smith or Fuji), washed and dried
- 1 cup granulated sugar
- 1/3 cup light corn syrup
- 1/4 cup water
- 1/4 teaspoon red food coloring
- Nonstick cooking spray (for parchment)
- Optional: 2 tablespoons chopped nuts, mini chocolate chips, or sprinkles
Instructions
- Step 1: Prepare Your Workspace
- Prepare a tray lined with parchment paper lightly sprayed with nonstick spray.
- Step 2: Prepare the Apples
- Core the apples and cut them into 1-inch chunks. Pat dry thoroughly with paper towels.
- Step 3: Insert Toothpicks
- Insert a toothpick into each apple chunk and set aside.
- Step 4: Make the Candy Coating
- In a small saucepan, combine sugar, corn syrup, and water. Stir to combine, then bring to a boil over medium-high heat without stirring further.
- Step 5: Reach Hard Crack Stage
- Boil until the mixture reaches 300°F (hard crack stage) on a candy thermometer, about 7–8 minutes. Remove from heat and stir in red food coloring.
- Step 6: Dip the Apple Bites
- Working quickly, dip each apple chunk into the hot candy coating, swirling to coat completely. Let excess drip off, then place on the prepared tray.
- Step 7: Add Toppings (Optional)
- If desired, immediately sprinkle with nuts, chocolate chips, or sprinkles before the coating hardens.
- Step 8: Cool and Set
- Allow to cool and harden completely at room temperature before serving.
Zusatztipps für die Zubereitung
For best results, ensure apples are very dry before dipping to help candy adhere properly. Use extreme caution when working with the candy coating, as it reaches extremely high temperatures and can cause serious burns. A candy thermometer is essential for achieving the perfect hard crack stage—if the temperature is too low, the coating will be sticky rather than crisp. If the candy begins to harden in the pan while you're working, you can briefly reheat it over low heat to return it to a workable consistency. Work in a cool, dry environment, as humidity can prevent the candy coating from setting properly. Store finished bites in an airtight container at room temperature for up to 2 days, though they're best enjoyed fresh on the day they're made.
Varianten und Anpassungen
Substitute green food coloring for a fun twist that creates vibrant green candy apples, perfect for St. Patrick's Day or themed parties. Try using different apple varieties to explore flavor profiles—Honeycrisp offers extra crunch and sweetness, while Pink Lady provides a beautiful pink-tinged flesh. For a seasonal variation, add 1/4 teaspoon of cinnamon extract to the candy coating for a warm, spiced flavor. Create a rainbow effect by dividing the candy mixture into separate batches and using different food coloring in each. For adult gatherings, brush apple chunks lightly with flavored liqueur before dipping. Make them extra decadent by drizzling cooled bites with melted white or dark chocolate. You can also experiment with different toppings like crushed pretzels, toffee bits, or freeze-dried fruit powder for unique flavor combinations.
Serviervorschläge
Arrange these festive bites on a decorative platter or cake stand for an eye-catching party display that guests can easily grab. They're perfect for Halloween parties, fall festivals, birthday celebrations, or any gathering where you want a fun, nostalgic treat. Serve alongside other carnival-inspired treats like popcorn balls or cotton candy for a themed dessert table. For children's parties, set up a DIY topping station where kids can customize their bites with various sprinkles and toppings before the coating sets. These mini candy apple bites also make wonderful edible party favors when individually wrapped in cellophane bags tied with colorful ribbons. Pair them with hot apple cider or warm spiced beverages for the ultimate autumn snacking experience. They're equally delightful as an after-dinner treat or a special afternoon snack that brings smiles to faces of all ages.
 Pin It
 These mini candy apple bites prove that good things really do come in small packages. With their jewel-like candy coating, convenient size, and irresistible combination of sweet and tart flavors, they're destined to become your go-to treat for celebrations and gatherings. The simple ingredient list and straightforward technique make them accessible even for novice candy makers, while the impressive presentation suggests hours of effort. Whether you stick with the classic red coating or experiment with different colors and toppings, each bite delivers that nostalgic carnival experience in a perfectly portioned package. So gather your apples, fire up your candy thermometer, and get ready to create a batch of these delightful treats that will have everyone reaching for just one more bite.
Recipe FAQs
- → What type of apples work best for the candy coating?
Crisp apples such as Granny Smith or Fuji are ideal as they hold their shape well and provide a tart, fresh contrast to the sweet coating.
- → How do I ensure the candy coating sticks properly?
Make sure the apple pieces are thoroughly dried before dipping to help the hot candy adhere evenly without sliding off.
- → What temperature should the candy mixture reach?
The candy mixture should be heated to 300°F (hard crack stage) to achieve a glossy, crunchy coating that sets firmly.
- → Can I add toppings to the candy-coated apples?
Yes, sprinkle chopped nuts, mini chocolate chips, or colorful sprinkles onto the coating immediately after dipping for extra texture and flavor.
- → How long does it take for the coating to harden?
Allow the coated apples to cool and harden completely at room temperature, which usually takes about 10-15 minutes.
- → Are these bites suitable for special diets?
These treats are vegetarian and gluten-free. However, check toppings for potential allergens like nuts if applicable.