 Pin It
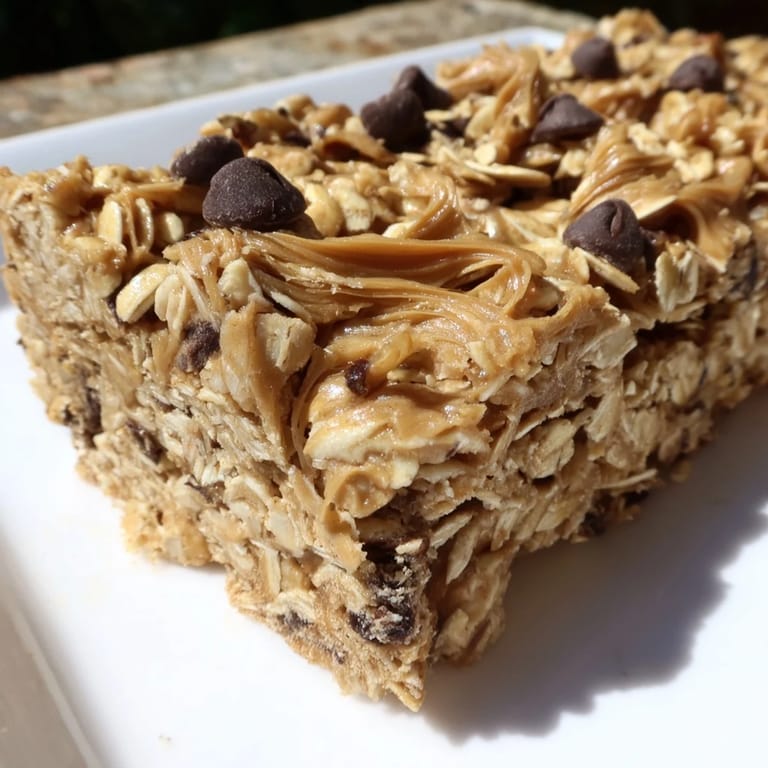
 There's something magical about standing in the kitchen with a banana in one hand and a jar of peanut butter in the other, realizing you don't need an oven to create something genuinely delicious. I discovered these bars on a lazy Sunday afternoon when my energy had completely flatlined, and I was craving something that tasted indulgent but wouldn't derail my week. Ten minutes later, I had a pan of chewy, wholesome goodness chilling in the fridge, and by evening, I understood why I'd keep making them.
I brought a batch to a hiking trip once, wrapped in foil and tucked into my backpack, and halfway up the trail, when my friend hit that inevitable energy wall, I pulled one out. The way her face lit up—like I'd just handed her pure comfort—reminded me that the simplest foods often mean the most because they show up exactly when you need them.
Ingredients
- Ripe bananas (2 large, mashed): The yellower and softer, the sweeter your bars—don't hold back on ripeness.
- Creamy peanut butter (1/2 cup): This is the soul of the recipe, so choose one you'd actually eat straight from the jar.
- Honey or maple syrup (1/4 cup): Honey brings a subtle floral sweetness; maple adds earthiness—pick based on your mood.
- Vanilla extract (1 tsp): Just a teaspoon, but it rounds out the flavors in a way that feels professional.
- Old-fashioned rolled oats (2 cups): The texture hero—they give the bars their perfect chewiness and wholesome backbone.
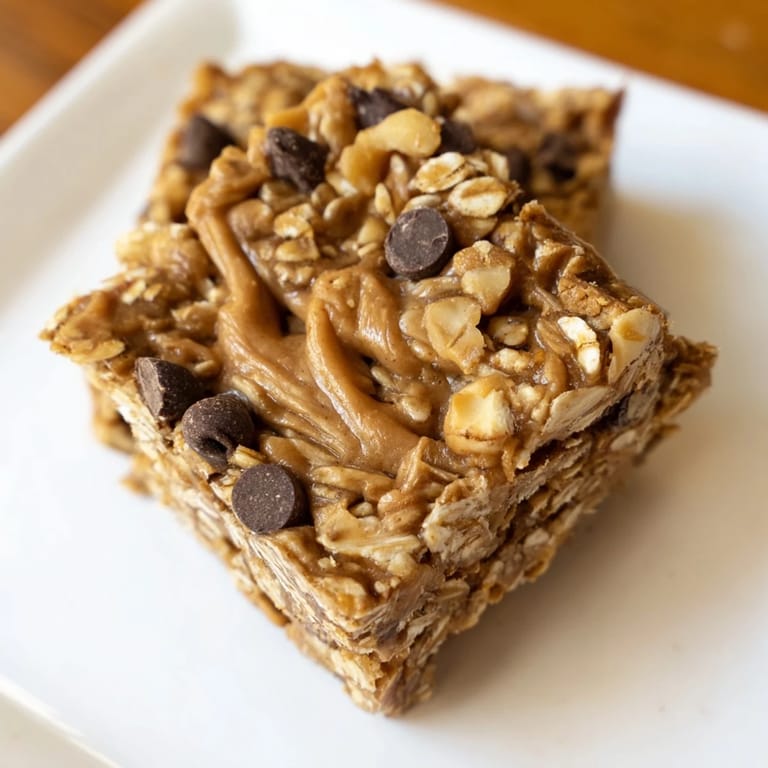
- Chopped walnuts or pecans (1/4 cup, optional): A handful adds crunch and richness if you want that textural contrast.
- Mini chocolate chips (1/4 cup, optional): Honestly? Always add them.
- Salt (1/4 tsp): A pinch that makes everything taste more like itself.
- Ground cinnamon (1/2 tsp): Warm spice that whispers in the background without announcing itself.
Tired of Takeout? 🥡
Get 10 meals you can make faster than delivery arrives. Seriously.
One email. No spam. Unsubscribe anytime.
Instructions
- Set up your stage:
- Line your 8x8-inch pan with parchment paper, letting it drape over the sides like a safety net. This is the move that makes everything after it effortless.
- Mash those bananas:
- Break them down in a large bowl until they're creamy and relatively smooth. Leave a few small flecks if you like—that rusticity is part of the charm.
- Build the wet base:
- Stir the peanut butter, honey, and vanilla into your mashed bananas until everything is evenly incorporated and looks like a thick spread. This is where the magic flavor foundation lives.
- Bring in the dry ingredients:
- Add the oats, salt, cinnamon, and any mix-ins you're using, then stir until you have one unified, chunky batter. You want every oat kissed with peanut butter.
- Press into the pan:
- Transfer everything to your lined pan and use the back of a spoon or spatula to press it down firmly and evenly. Take a moment here—good pressing means clean bars later.
- Chill and set:
- Refrigerate for at least an hour until the mixture feels firm and holds together when you press it. Patience here pays off in perfect slices.
- Slice and store:
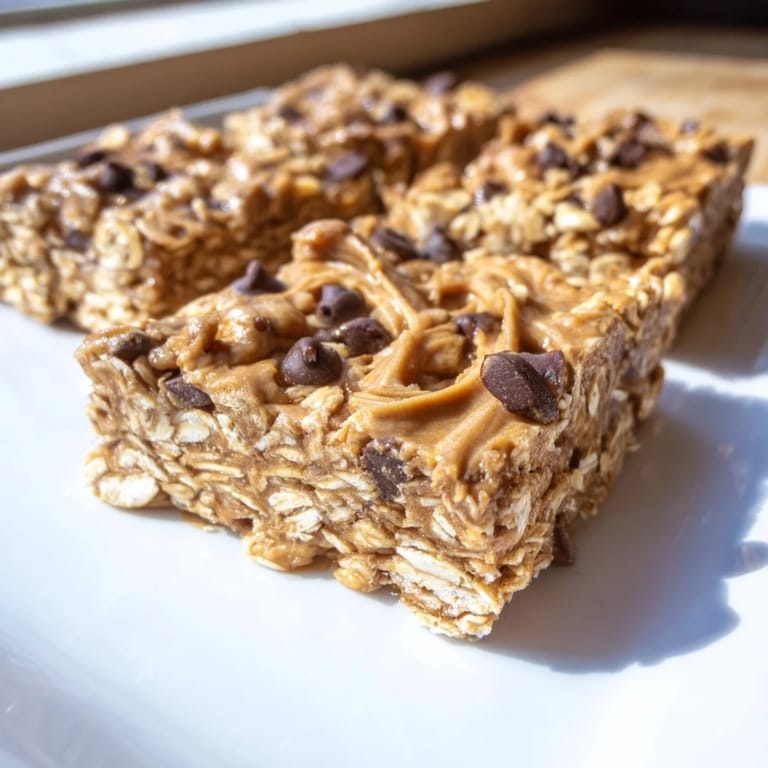
- Lift the whole slab out using the parchment overhang, place it on a cutting board, and slice into 12 bars with a sharp knife. Keep them in an airtight container in the fridge for up to a week.
 Pin It
 The first time I made a batch and actually sliced them perfectly—clean edges, no crumbling, just a row of beautiful bars—I felt an absurd sense of accomplishment. It sounds small, but that's when I realized these weren't just snacks; they were proof that the simplest methods, done thoughtfully, create something you're genuinely proud to serve.
Why These Bars Became My Go-To
There's a particular freedom in making something without an oven. No preheating, no temperature anxiety, no wondering if you closed the door softly enough. You mix, you press, you refrigerate, and then you have a week's worth of reliable energy bites sitting in your fridge like edible insurance against 3 p.m. crashes. The whole process feels more like assembly than cooking, which somehow makes it feel more achievable on mornings when motivation is scarce.
Customizing to Your Cravings
The beauty here is that these bars are forgiving and flexible. Almond butter, sunflower seed butter, tahini—any nut or seed butter works and shifts the flavor in interesting ways. I've added dried cranberries when I wanted something tart, swapped in dark chocolate chips for sophistication, and once threw in a handful of coconut flakes because I was in that kind of mood. The formula stays solid; only the personality changes.
Storage and Travel Notes
These bars are practically designed for real life. Individually wrapped in parchment paper or small containers, they fit into backpacks, lunch boxes, and car cup holders without complaint. They actually taste better cold, and they hold up beautifully for several days without drying out or getting weird, which is rare in the snack world.
- Store them in an airtight container in the fridge for up to a week, or freeze for up to a month.
- For a vegan version, swap honey for maple syrup and use dairy-free chocolate chips.
- Wrap individual bars in foil or parchment for grab-and-go convenience.
 Pin It
 These bars have become the snack I make when I want to feel nourished rather than just filled. They're the answer when you want something that tastes good and actually means something.
Recipe FAQs
- → What makes these bars chewy?
The combination of ripe mashed bananas and creamy peanut butter binds the oats together, providing a naturally chewy texture without baking.
- → Can I customize the bars with other ingredients?
Yes, you can add chopped walnuts, pecans, or mini chocolate chips for extra flavor and texture. Dried fruit like cranberries or raisins also works well.
- → How long should the bars be chilled?
Chill the mixture for at least one hour in the refrigerator so it firms up enough to cut cleanly into bars.
- → Are these bars suitable for vegans?
To make a vegan-friendly version, substitute honey with maple syrup and use dairy-free chocolate chips if adding them.
- → How should the bars be stored?
Store the bars in an airtight container in the fridge for up to one week to maintain freshness and firmness.
- → Can I replace peanut butter with another nut butter?
Yes, almond butter or sunflower seed butter are excellent alternatives that can be used without affecting the overall texture.